I just have to talk about canning again–IT’S THAT IMPORTANT!!

My husband just alerted me to this little item of recent news:

http://www.kplu.org/post/home-canning-hobby-leads-near-fatal-medical-emergency


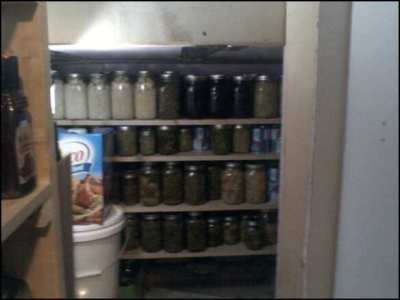
Now that the gardens are producing a harvest, the canning and preserving season is upon us. I’ve already canned eight quarts of Callaloo (Amaranth) Greens, six quarts of Kale Greens, 10 Quarts of Green and Yellow Wax beans, and I have frozen about 10 Pounds of Cabbage. I have also harvested about a peck of Eggplants (didn’t can em because we ate em!  Recipe below. . .), and we have dug about 10 pounds of potatoes, and a bushel of onions.

EXIF_JPEG_T422

When I read the article above, I thought I’d write a little reminder about CANNING stuff.  I sure hope that people AREN’T dusting off their old canning recipes, and I hope that people ARE using the correct equipment and recipes!  No cutting of corners allowed!  This fellow didn’t, and nearly lost his life. . .


What really bothers me is that the title of this article gives the impression that Home Canning is in and of itself a dangerous activity that will result in poisoning. The comments by this man’s daughter that there will be “no more canning” also lends credence to this wrongful statement. What it actually should have said is that ERRORS made in Home Canning Hobby Leads to Near-Fatal Medical Emergency. I have been canning for years, and I am currently waiting for Penn State University to let me know when their next Master Preserver class will be. While I wait, I am taking an online class offered by the National Center for Home Food Preservation.  I can both vegetables and meats, and I am constantly warning people to rely ONLY on scientifically tried and true recipes when canning. Canning is not the time to cut any corners at all, nor is it the time to display your prowess as a gourmet cook. Foods are best canned SIMPLY, and one can then use them in fancy recipes LATER, after they are decanted. If the man named in the above article  had followed the recommendations of the Ball Blue Book and the National Center for Home Food Preservation, he would have had no problems. Elk  (and venison) is to be canned for 90 minutes (quart jars) at 10 pounds pressure in a weighted gauge canner or 11 pounds pressure in a dial gauge canner (at elevations of 1000 feet above sea level or less), or at 75 minutes (pints) at 10 pounds pressure (weighted gauge) or 11 pounds pressure (dial gauge), elevations of 1000 feet above sea level or less. 

Please notice that in this recipe as in ALL canning recipes, the size of the jar, the type of pressure canner and the altitude of your town or city are all important considerations to the process.  For example, higher altitudes require longer processing times.   (For your information, Harrisburg is 320 feet above sea level.)  No exceptions and no shortcuts are allowed in this recipe and it may never be altered in any way. This is also the correct recipe for canning beef. Home canning is safe, enjoyable and economical, but only if you follow the rules.

EXIF_JPEG_T422

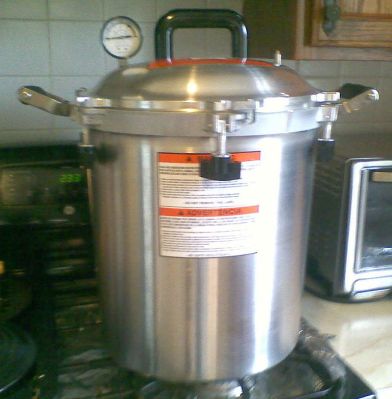
This is my pride and joy, my beautiful new All American Pressure canner.  This beauty can CAN up to 14 quarts of food at a time.  . .

It is perfectly safe to borrow or buy a used canner, but your first trip should be to your local University or College Extension service to have the Dial Gauge canner pressure-tested for safety.  If you buy or borrow a used Weighted Gauge Pressure Canner, you do not need to have it tested, but you must buy all new working parts for it, for safety (the working parts include the rubber gasket or sealing ring, the overpressure plug, the vent pipe assembly and the interlock assembly).  You do not have to replace the Weighted Gauge.  These parts are not really that expensive.  If you own any type of Pressure Canner it really is a good idea to replace all of the parts every other year anyway.  You should also never DROP a canner, and you should never use a canner that is dented or warped.  Here’s a good place to buy replacement parts:

http://www.pressurecooker-outl…

I also want to remind everyone that according to the USDA, any canning recipe OLDER than 1988 is DANGEROUS. The old recipes that Mom and Grandma may have used are not good. You CANNOT preserve Corn, Greens and Green Beans in a boiling water bath canner.  No matter how long you boil them at 212 degrees, the food will not be safe to eat.  It will not be safe, even if you boil it all over again before eating it.  The Botulism Bacteria cannot be boiled away.  The man in the article mentioned above learned this to his sorrow. There are no recipes for canning low acid foods such as meats and vegetables in a boiling water bath canner.  I do have a 100-year-old cookbook that does give some times for canning stuff like corn in a boiling water bath, but I will never give out that information to anyone.  The fact is that these recipes  were no good back then, but people simply took a chance because there was no better information available. Please don’t use or rely on any “old fashioned” recipes. The Ball Blue Book, which is actually sold in the Giant and Karns Supermarkets, is fairly inexpensive (about $5) and reliable. Also, you can get recipes for FREE from the National Center for Home Food Preservation website. Don’t take foolish chances!

Also, you must stick to the types of jars and lids indicated here:

http://nchfp.uga.edu/how/general/recomm_jars_lids.html

Currently, the so-called “reusable” canning lids are not recommended due to problems with seal failure.


Speaking of used canners, I now have one for sale. Now that I have both a brand-new All American 30 Quart Pressure Canner, and an extra Presto 16 Quart canner,  I won’t need this spare one anymore.  I am selling a Presto 16-Quart Pressure Canner and Cooker. This canner will process 12 half-pints, 10 pints, or 7 quarts and comes with an adjustable Weighted Gauge for processing at 5, 10, or 15 pounds pressure and the gasket and canning rack. I am also throwing in the instruction book.  If anyone is interested, please comment here or send me an email. . .I’ll bring it over to the Gardens for you. . .

Price Is $60.00.


Here are some canning recipes covering the most commonly grown vegetables in the Community Gardens (brought to you by the National Center for Home Food Preservation): 


Greens (Kale, Collard, Mustard, Spinach)

            http://nchfp.uga.edu/how/can_04/spinach_greens.html


Green Beans or Wax Beans

            http://nchfp.uga.edu/how/can_04/beans_snap_italian.html


Corn

            http://nchfp.uga.edu/how/can_04/corn_kernel.html


Okra

            http://nchfp.uga.edu/how/can_04/okra.html


Potatoes

            http://nchfp.uga.edu/how/can_04/potato_white.html


Sweet Potatoes

            http://nchfp.uga.edu/how/can_04/potato_sweet.html


Squash (Winter or Pumpkin ONLY.  WARNING DO NOT CAN PUMPKIN PIE FILLING AND DO NOT PUREE THE SQUASH~!! )

            http://nchfp.uga.edu/how/can_04/pumpkin_winter_squash.html


Tomatoes, Crushed

            http://nchfp.uga.edu/how/can_03/tomato_crushed.html


Tomatoes with Okra and Zucchini

            http://nchfp.uga.edu/how/can_03/tomato_okra_zucchini.html


Tomato Spaghetti Sauce

            http://nchfp.uga.edu/how/can_03/spaghetti_sauce.html


Tomato Spaghetti Sauce with Meat

            http://nchfp.uga.edu/how/can_03/spaghetti_sauce_meat.html


Tomato Salsa

            http://nchfp.uga.edu/how/can_salsa/tomato_salsa_paste_tomatoes.html


Green Peas

            http://nchfp.uga.edu/how/can_04/peas_green_shelled.html


Sauerkraut (Cabbage must be canned as Sauerkraut—You cannot can Cabbage, but you can freeze it)

            http://nchfp.uga.edu/how/can_06/sauerkraut.html

And now. . .I must mention the stuff that you should NEVER can.  It’s just too dangerous.

EXIF_JPEG_T422

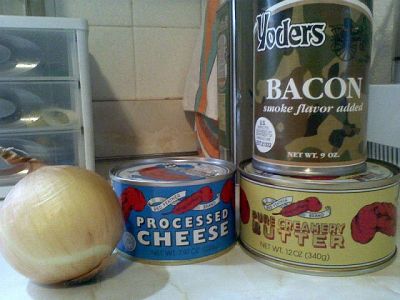
As you can see, I am showing COMMERCIALLY CANNED cheese, butter and bacon, and there is a garden-grown onion sitting next to them.   If I want stuff like canned cheese, butter and bacon for my pantry, I BUY it from stores, but I will NEVER attempt to can these things at home.

I am saying this because there are boucoup internet websites that seem to convey the idea that canning bacon, cheese and butter at home is cool.  Well, folks, it is NOT COOL.

Yes, it does sound like a good idea to can stuff like bacon, but the simple fact is that there are NO home canning recipes for these things that are safe.  Bacon, for example, is far too oily to can and attempting to can it will result in seal failure because the bacon fat will coat the rim of the jar and the seal during the canning process and cause seal failure.  The same thing will happen with cheese and butter.  Furthermore, the milk sugars in cheese will caramelize during the canning process and the resultant product will be as hard as a rock and inedible.   Finally, there are no scientifically accurate recipes that give any accurate times for canning bacon, cheese and butter.  So if you want to store these items in your pantry in case of an emergency or keep them for winter storage, BUY them commercially canned, or else buy them at the supermarket and FREEZE them.  Bacon, cheese and butter will keep very well in air-tight bags in the FREEZER.

But what about that onion?  Well, for some reason, onions are also dangerous to can by themselves.

Well, the only safe way to can an onion is to pickle it.   A BIT of chopped onion can be added to some canning recipes and processed  (such as in Spaghetti Sauce), but generally, citric acid or vinegar is added to these recipes as well to acidify them.  In every other case, onions are pickled in vinegar brine or they are part of pickle recipes.  The only safe ways to prepare onions for storage is to chop and FREEZE them, or dehydrate them.    For example, I wanted to store caramelized onions for French Onion Soup, so after preparing them, I put them in freezer bags and placed them in the freezer for keeping.  One other way to keep onions for at least a little while is to dry them out and store them in a wooden box in your basement if your basement is cool, clean and dry.   For the onion, canning is out of the question.

And now, that EGGPLANT recipe.  I use this one.  It’s great! Absolutely delicious and the eggplant gets eaten up very quickly with this one.

Courtesy, Wandering Chopsticks. . .

http://wanderingchopsticks.blogspot.com/2008/08/ca-tim-nhan-cha-tom-vietnamese-eggplant.html

As usual, comments are very welcome. . .


Things that Bug Me. . .and YOU. . .

Now that the Gardens are about to open for another wonderful season, there are a few things that I must say over again.  This is all about BUGS AND BLIGHTS and controlling them.  I was going to also include some material about what is really bugging me about the canning and preserving information on the internet, but I am working on a canning and preserving course and I want to wait until I am done with that before presenting the information learned to you.

Also, I wanted to talk about fertilizer and garden prep, but I have been getting so many questions about pest control that I decided to talk about this issue first.  My next will have some information about garden preparation.


Colorado Potato Beetle

It is a good thing that people are thinking about bugs NOW.  It is before the bugs come out that one needs to think about the damage they will do and how that damage can safely be controlled.

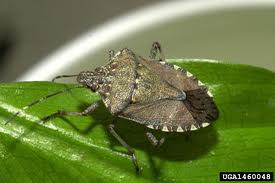
stinkbug

Some of these critters can and will eat anything. . .even a tobacco plant. . .

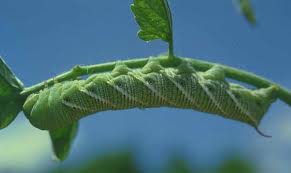
tomatohornworm

And they’ll do it mighty fast. . .

cornearworm

And not only will they eat up your garden quickly, they will leave millions of little ones behind to finish the job. . .

cucumber beetle

Or they will spread all types of contagion, like Blue Blight or even the dreaded Late Blight—the same disease that caused the Irish Potato Famine.

The problem is—what are the safest and most effective controls?   (Is it just me, or are all those pictures of bugs so creepy that your skin CRAWLS???!?  GOOD!

garden sprayer

There’s a tremendous difference between spraying ornamental plants like roses and spraying a vegetable garden. The roses might be cut for decorative bouquets, but you and your family are  going to eat the vegetables. It is essential that you make sure that there are no chemical residues left on the food. Be observant and read the labels—many insecticides are not labeled for use on vegetable gardens.

Of the insecticides that are labeled for use on vegetables, very few are labeled for use on every vegetable or fruit in the garden. Be sure the insecticide is labeled for use on the vegetable crop you plan to treat.

Also, make sure you understand the time that must elapse between the spraying of the garden and the harvesting of the veggies. This time varies according to what is being sprayed (or dusted on) the particular vegetable crop being treated. For example, time between treatment and harvest for carbaryl (Sevin) is 2 days on corn, 3 days on tomatoes, 7 days on Irish potatoes, and 14 days on turnips. Not understanding this could result in you serving chemically contaminated food to your family and friends. Please read all labels completely.

TestTubePlants

Of course, I am NOT suggesting that anyone use SEVIN in their garden at all.  As I mentioned in a previous blog, SEVIN has not been proved entirely safe for use on vegetables and chemical-based controls may not work in the Community Gardens.  First, there is the ever-present problem of “overspray,” where whatever it is you are spraying on your veggies winds up drifting over your neighbor’s garden.  Many of us are organic gardeners and while we don’t care what you spray on your garden, we very much care about chemicals drifting over on the air currents and settling on our plants.  Many of the more popular chemical garden sprays are useless in the Community Gardens anyway because they have been used so often and in such large quantities that the bugs have grown immune to them.

DON’T BOTHER WITH:

SEVIN (Carbaryl)  or

MALATHION

These will not kill much of any of the garden pests in the Community Gardens, but they can contaminate your vegetables and leave residues that will make you sick.  In fact, SEVIN does nothing at all to control Colorado Potato Beetles, Stink Bugs or Cucumber Beetles, which are the worst of the pests over there.

Also, ROTENONE, though derived from natural sources has been rendered ineffective due to overuse.

If you believe in better living through chemistry, there is a new class of chemicals that are SYNTHETIC Pyrethrins called PERMETHRINS, and these are being sold as sprays and dusts for vegetable gardens, but like their organic counterpart, Pyrethrin, overuse of PERMETHRINS can cause populations of flea beetles, spider mites, whiteflies and aphids to increase rapidly. And these little devils can do a tremendous amount of damage to leafy greens like spinach, collards, and kales.  Also, PERMETHRINS cannot be sprayed on every single type of veggie, and they may leave behind undesirable residues. Please read the labels carefully.

If at all possible, what you SHOULD use are the organic controls.  AND YES, they DO work, quite effectively in fact.  Using these organic controls allowed us to harvest over 200 pounds of potatoes in 2012.  YUP—200 pounds!

YOU SHOULD TRY:

InsecticidalSoap

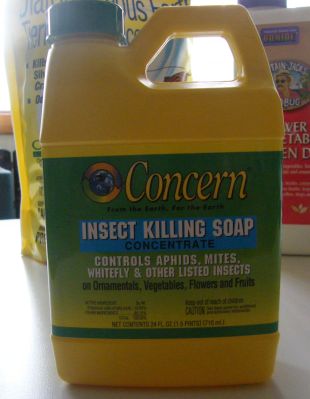
Insecticidal Soaps –for control of aphids, whiteflies, mites and flea beetles. Either Concern or Safer Insecticidal Soap is a good choice.

neem oil bottle

Neem Oil—any brand is good.  Neem controls many pests, including spider mites, flea beetles, cabbage worms, squash bugs, whiteflies and leafhoppers.

thuricideBt potato beetle beater

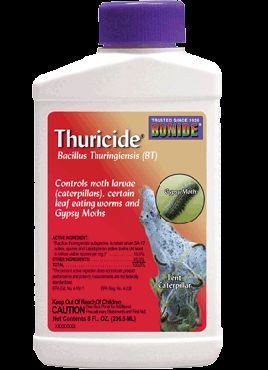
Bacillus thuringiensis  (Bt) is great for controlling the caterpillar or worm form of many insects, and certain species of Bt (Bacillus thuringiensis var. tenebrionis) control the Colorado Potato Beetle as well.  The kurstaki var.  is sold as Thuricide or Dipel, and the tenebrionis var.  is sold as Colorado Potato Beetle Beater.  Bt Kurstaki is EXCELLENT for controlling earworms on corn or hornworms on tomatoes.

CaptainJack

CaptJackConc

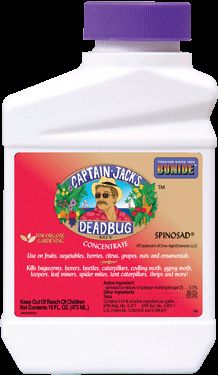
Spinosad, also known as Captain Jack’s Dead Bug Brew or Bulls’ Eye, is an excellent choice for controlling a large variety of vegetable garden pests, INCLUDING the Colorado Beetle, the Stink Bug and the Japanese Beetle.  It is also an effective control for the Cucumber Beetle, which seems to eat virtually everything in the garden.

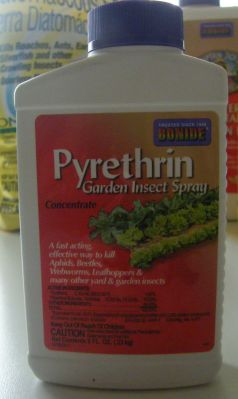
Pyrethrin

Pyrethrins—Natural insecticide derived from an African Daisy. Important to only use occasionally for the QUICK kill and “knock down” of infestations.  Then revert to one of the other methods.

DE1

Now we come to DIATOMACEOUS EARTH (DE) ,  one of the very best organic controls for garden pests.  Diatomaceous Earth is a naturally occurring, soft, sedimentary rock that is easily crumbled into a fine white powder.  Different grades of DE have different particle sizes depending on its use. To humans, the powder has a mildly abrasive feel and is very light.

DE is made up of fossilized remains of diatoms, type of hard-shelled algae.  It is used as a filtration aid, a mild abrasive in products including  toothpaste and scrubbing powers (like Ajax or Comet),  mechanical insecticides, absorbents for liquids, matting agents for coatings, a reinforcing filler in plastics and rubber, cat litter, activators in blood clotting agents.  It is also a stabilizing component of dynamite and a thermal insulator. We are interested here in its use as a natural insecticide.

DE is used as an insecticide due to its drying properties.  The fine powder absorbs the fats and waxes that make up the carapace of the insect’s bodies or exoskeletons (outer shell), causing the insect to dehydrate. Insects then die as a result of the water deficiency. This drying and abrasive property also works on worms, slugs and caterpillars. DE can be used alone but it is sometimes mixed with an attractant or other additives to increase its effectiveness.  Medical-grade DE is sometimes used to de-worm livestock and humans.  In order to be effective as an insecticide, diatomaceous earth must be a fine powder, with a mean particle size below 12 microns.  For this reason, most insecticidal DE is “food grade,” that is to say, it is exactly the same as the type added to toothpastes.  Pool filter DE may not work as effectively as it is not “food grade.”  Also pool filter DE may contain additives like citric acid or other chemicals that make it unsuitable for garden use.

DE is an effective mechanical killer that no insects have a defense against.  To humans, DE   feels like talcum powder. To insects, however, the tiny particles are razor sharp and slice through their outer shells when they try to climb over it .  This cutting open of their outer shell exposes their inner soft tissue to air and they dehydrate within 24-48 hours.  If they bite into a plant covered with DE, it tears up their mouth and digestive systems.  However, DE does not harm mammals at all. While DE is a death sentence for insects, it will not harm you or your pets. Since DE is not chemical in nature and works mechanically, pests cannot build resistance to it, unlike chemical pesticides. DE also offers the added benefit of supplying your soil with micronutrients and calcium as it breaks down. DE  should be used only when you are sure that the weather will be dry for a couple days.

I usually mix my DE with  Captain Jack Deadbug Brew Dust, which makes a very effective killer for Colorado Potato Beetles, Cucumber Beetles and Stink Bugs.

A SPECIAL NOTE (ONCE AGAIN) ABOUT THE IMPORTANCE OF FUNGICIDES. . .

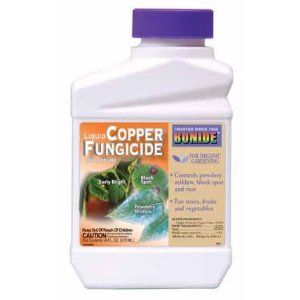
copperfungicide

Blights, or fungal plant diseases are a real problem in the Community Gardens.  If you have had seasons of little to no success with squash, melons or cucumbers, then blame it on the blight problem.  The trouble is that now, we have a much worse blight to worry about.

In a previous blog, I mentioned that the LATE BLIGHT has been detected in Pennsylvania, not far from here.  Late Blight is the very same plant disease that caused the Irish Potato Famine, and it affects nearly all plants in the genus Solanaceae. Solanaceae are a family of flowering plants that includes a number of important edible agricultural crops. Although many species are poisonous, some are edible and healthy. The family is also informally known as the nightshade family.

The family includes mandrake, deadly nightshade, tomatillo , cape gooseberry, chili pepper, bell pepper, potato, tomato, eggplant, and petunia.  All of these are technically nightshades.

Yeah! Petunias—Who Knew????!?

Anyway, many members of the Solanaceae family are used by humans as important sources of food, spice and medicine.  One of the things that these plants have in common is that they are all predated by the same type of bugs.  For example, the Colorado Beetle will eat Tomaotes, Tomatillos, Potatoes, certain Peppers and eggplants.  But the important thing to remember now is that the SAME BLIGHTS will also trouble and destroy members of this plant family.

Late Blight is caused by the fungus Phytophthora infestans. It can infect and destroy the leaves, stems, fruits, and tubers of plants in the nightshade family, including potatoes, tomatoes and eggplants.  Before the disease appeared in Ireland it caused a devastating epidemic in the early 1840s in the northeastern United States. P. infestans was probably introduced to the United States from central Mexico, which is its center of origin. After appearing in North America and Europe during the 1840s, the disease spread throughout most of the rest of the world during subsequent decades and had a worldwide distribution by the beginning of the twentieth century. And as I wrote in a previous blog, Late Blight HAS BEEN DETECTED IN CENTRAL PENNSYLVANIA.  So folks, it is here.

Late Blight Fungus spreads from plant to plant in the air, through the splashing of rain and by direct contact.  An entire garden can be destroyed by Late Blight in DAYS! Severe late blight epidemics occur under conditions of high moisture and moderate temperatures (60 to 80 degrees).  This means that the danger is HIGHEST in late spring—April, May and early June.  Infected plants MUST BE ENTIRELY REMOVED FROM THE GARDEN—you cannot save any part of the plant and the plant should NOT BE ADDED to compost piles.

It is therefore ESSENTIAL that any tomatoes, potatoes, eggplants, or peppers planted in April and May be promptly treated with fungicides, and that use of fungicides continue on a regular basis throughout the season.  I prefer to use the organic fungicide shown above, but any one that is intended for use in vegetable gardens is okay.

You also need to know that a very common blight at the Community Gardens is Blue Blight or Powdery Mildew, which appears as bluish or whitish spots on the leaves of cucumbers and squash.  This blight may also affect tomatoes as well.  I have also seen Cucumber Blight and Black Rot in the Gardens.  These types of fungus live in the soil and erupt with excessive rain or overwatering.  Fungicide use and careful watering (not watering in the late evening when plants will remain wet, for example)  will control these types of blights as well.

Here is an illustration of Late Blight on a Tomato:

lateblight potatotoo

blighted tomato vines

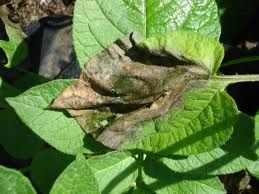
and on a Potato

potato late blight

You can read more information about Late Blight here

http://usablight.org/

EXIF_JPEG_T422

In the next post, I will give more information on preserving the harvest, such as recommendations for where to obtain canning and dehydrating supplies, and what type of supplies are best for use.  I am in the middle of taking a Food Preservation Course offered by the National Center for Home Food Preservation, and I want to finish the course first.

Hopefully the Gardens will be open by the time of my next post.  See you there.

Community Garden Countdown begins!

EXIF_JPEG_T422

When it looks like this outside, it’s hard to believe that spring is just around the corner.  And there is no more certain sign of spring than the annual letter saying that it is time to claim your plot at the Dauphin County Community Gardens!

I got my letter.   That always makes me do the happy dance! It looks like the Gardens will probably be open by mid-March this year.

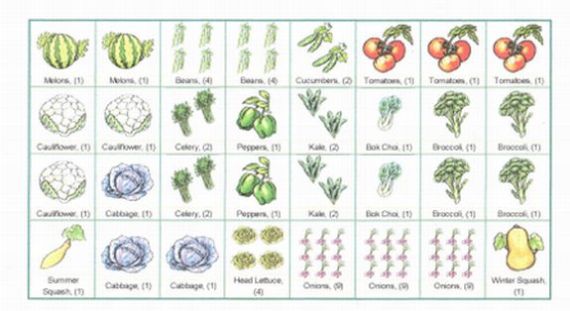
I cannot overemphasize the importance of planning.  Without a proper plan, you will have trouble making sure that your plants aren’t either overcrowded or taking up more space than they should.  Without a plan, you cannot rotate crops.  Finally, many who fail to plan end up annoying their neighbors by putting plants in places where they do not belong, such as walkways and even other peoples gardens.

Here is a proposed garden plan specifically designed for a plot at the Dauphin County Community Gardens.

http://www.growveg.com/garden-plan.aspx?p=357322

The really cool thing about this Garden Planner is that it includes information about the types and NUMBERS of plants as well as their proper planting times.   This type of information is essential to know, especially if you PLAN secondary plantings for fall harvest.


AND NOW, A LITTLE MORE ABOUT FOOD PRESERVATION

I have been trying to get myself into a class for Master Food Preserver.  Typically, these classes are offered by Penn State at University Park.  I contacted the University about the class about two months ago, but so far I have heard nothing at all.  Nevertheless, I am soldiering on with this, and studying the latest science on proper and safe food preservation techniques.  Without the certification from the University, I cannot claim to be a Master Preserver; however, I have read enough about food preservation to be able to pass the best possible information on to you.

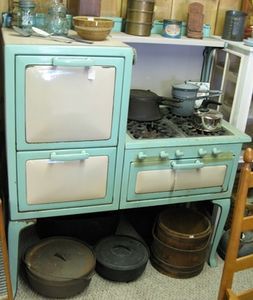
oldfashionedkitchenstove

The DANGER OF USING OLD FASHIONED METHODS

There are a couple of very important things about canning that I absolutely MUST emphasize to you for your own safety.

First of all, I cannot overemphasize the DANGER of using old fashioned canning methods. The internet has myriad websites where people have actually posted wrong information about canning.  I have read some hair-raising stuff that just scares me to death. These are the most popular myths to be wary of:

1.  If I am using heirloom vegetables, it is perfectly safe to process everything I harvest in a boiling water bath canner.

2. My (Old Aunt, Grandmother, Great Grandmother, Mother or other relative) used the boiling water bath method FOR EVERYTHING and served the food to us for years.  Nothing ever happened in our family and so I am going to use the same method.

Both of these ideas are WRONG and dangerous!  Heirloom vegetables, even those grown from saved seed are still dangerous if the method of preservation is not correct.  Heirloom sweet corn processed in a boiling water bath canner can poison you with botulism just the same as modern hybrid corn processed in a boiling water bath canner will. The point is that CORN CANNOT BE PRESERVED WITHOUT A PRESSURE CANNER.   And just because your older relatives canned in the old fashioned manner and family members somehow escaped death means nothing.  I am almost willing to bet money that stomach upset and the so-called stomach flu was common in those cases.  My daughter’s pediatrician once told me that there is no such thing as “stomach flu.”  He said that every single case of “stomach flu” he’d ever seen was actually food poisoning.  Family members probably survived the meal because vegetables were typically severely over-cooked in the old days, being very frequently boiled into near mush before being served.  This severe cooking process probably destroyed enough of the toxin so that a mere stomach upset resulted rather than death.

The other problem with the old fashioned methods is that there are NO SCIENTIFICALLY ACCURATE PROCESSING TIMES for low-acid vegetables in a boiling water bath canner.  I own a cookbook that is nearly 100 years old.  Some of the processing times indicated under the old methods are as long as 24 hours. How do you keep water boiling for 24 hours?  Someone  must stay up and be adding boiling water to the canning vessel constantly.  You cannot allow the canner to boil dry.  And even then, the results of the process are UNSAFE TO EAT because boiling water can never get hot enough to kill off all of the bacteria.

Preserving food is not the time to implement sentimental family recipes or processes.  I must emphasize that ANY CANNING RECIPES OLDER THAN 1988 ARE WORTHLESS.  Unless you have had those recipes tested in a University-based Food Sciences kitchen, you are taking a terrible chance.

Another thing that I must warn people about (and I think that I did blog about this) is the use of so-called reusable canning lids.  That’s a no-no.  These reusable lids have not been proven to seal and stay sealed properly.   Because of the sudden seal failure, the food can quickly spoil, leading to waste.

Finally, people have asked me why the canning recipes I have given are so very PLAIN.  The simple explanation is that food must be preserved or canned plain.  You see, canning is NOT the time for cooking creativity.  Fancy recipes, many of which have been handed down, are very chancy and some are even dangerous. The basic premise behind home food preservation is that you are PRESERVING the basic food for later use in recipes.  For example, potatoes should be washed, peeled and cut into 1-inch squares and simply processed with water and salt in a Pressure Canner.  The result is plain old potatoes, but those plain potatoes can then later be made into potato salad, prepared as hash browns for breakfast, added to casseroles, or even oven-fried.  You see, the recipe comes AFTER the preserved food is decanted from the jar, not generally before.

The National Center for Home Food Preservation website and the Ball Blue Book are the only places where there are recipes given that can be prepared for canning.  These recipes have been tested by scientists for safety.  I don’t believe that any other sources are trustworthy.

Finally, as the gardens are opening, probably next month, some little reminders:

DontForget

Of course, you don’t want to forget that the Garden Registration this year is the FIRST full week of March this year, beginning on March 6 for people who had gardens last year and March 7 for new gardeners.   After the registration, the Gardens will probably be tilled and opened for planting very quickly.  About the only things that can be planted in the early Spring season are brassicas (Kale, Broccoli, Mustard Greens, Collards), lettuces, radishes, onions and peas. It is still way too early for things like corn, tomatoes and potatoes, and peppers.  I have seen many people attempt to plant corn in late March or April only to have disastrous results.  No corn should be planted until at least after May 10.

Your Etiquette

And with the opening of the Gardens comes the annual problem of some people forgetting their manners. Older gardeners fully understand these rules, but new people need a reminder.  First and foremost, please read the materials that are handed to you at the Registration.  There are rules and regulations for the Community Gardens that make the gardening experience enjoyable for everyone.  Use the garden maps to determine where your plot is.  DON’T REMOVE THE BLUE-TOPPED GARDEN BORDER MARKERS; if you do and your neighbors complain, you can be immediately banned from the Gardens.  Don’t  bring your dog to the Gardens–they aren’t allowed in there.  Don’t plant things in other people’s plots and  do not annex the paths and walkways to your garden plot as extra planting space. Finally,  do not allow your children to play with or on the water pumps–the pumps have pinch points that could injure little hands.


The next posting to this blog will include some brief reminders about garden preparation and I will give some suggestions regarding fertilizer.  As usual, please feel free to post comments and suggestions.


GMO–What’s It To YA?

New growth


GMO stands for Genetically Modified Organism.  Since we are gardeners, this discussion will be specifically about GMO seeds and plants and whether or not you should care about using them in your garden.  This is especially relevant now, since this is the time that people give consideration to the purchase of seeds and plants for the upcoming season.

In a previous blog, I discussed the pros and cons of Organic Gardening and Traditional Gardening.  Of course, how you decide to do your gardening is entirely up to you, but after careful study and consideration I have gone organic.  Why?  Organic Gardening concentrates on building up the soil naturally so that a healthy, natural growing environment is created for the plants, one that is as free as possible of any type of unnatural contaminants.  On the other hand, Traditional Gardening is a lot like Traditional Farming—the techniques used are heavily reliant on the use of chemical fertilizers and pesticides.  Traditional Gardening may give quick and easy results, but it does not restore the land itself.  You can get pretty good results, but the chemicals must be used year in and year out or there will be no harvest.  On the other hand, you can get really good results from being Organic, but there’s a lot of work involved in getting those results.

The issue of GMO seeds and plants is a lot like the issue surrounding Traditional Farming and Gardening.  The use of GMO seeds and plants can give quick and handy results with little to no work, but in the course of their use, nature itself is robbed and supplanted with something that is abnormal and potentially dangerous.

TestTubePlants

What is a GMO seed or plant?

A seed or plant that is Genetically Modified has had its DNA changed through genetic engineering. Unlike genetic modification that is carried out through time-tested conventional breeding of plants and animals, the genes from one species (plant) may be combined with genes from a completely different organism or species in order to give the plant characteristics that are not naturally found within its species. This is known as “recombinant DNA technology”, and the resulting organism is said to be “genetically modified,” “genetically engineered,” or “transgenic.”

Mendel

“Well, “ you may ask, “isn’t this exactly the same as cross breeding things?”  The answer is NOPE.

In traditional cross breeding, members of the SAME SPECIES are bred through successive generations in order to achieve certain traits.  For example, there are now thousands of different breeds of dogs, all the result of breeding one kind of DOG with another kind of DOG.  The thing is , however, that only DOGS are used in the cross-breeding—a single species, generally canines or  canis familaris.

There are hundreds of different types of corn, of tomatoes, of peppers, of  beans, of squash, and even of flowers, all achieved by cross breeding within the individual plant species itself. The species Corn, for example (Zea Mays) has been cross-bred by humans over the centuries to produce sweeter and sweeter varieties so that we now enjoy the sweet corn we have today. But corn is still corn. One of the things that I warn about is that corn will self pollinate within its species, and that if you want to keep your sweet corn sweet, it must be isolated from other types of Zea Mays. Corn will naturally breed with Corn, just like dogs will naturally breed with dogs.

Up until now, human cross-breeding of plant and animal species only dealt with the breeding of types within the given species.  However, large corporations have seen a profit in combining the genes of plants and animals with the genes of certain bacteria, of certain worms, of certain insects, all by “cracking open” the DNA itself and inserting genetic material from sources that would never naturally get in there.

questionmark

Why in the worlds would someone do this?

For the same reason that some people chose Traditional Gardening over Organic Gardening; to get quick and easy results with little to no work involved.  Some people would be lured by the time and labor saving aspects of it all, and that is the problem.

For example, if you could “make” corn resistant to the defoliant herbicide Round-Up, then instead of hiring boucoups people to do traditional weeding of the fields, you could simply overspray everything with Round-Up (or even Agent Orange). The weeds would be killed off, and the corn plants would still be there, albeit tainted with Round-Up.   Certain corn has been bred with the genes from the BT bacteria so that it has a “Naturally” occurring pesticide right within the corn that fights the earworm and borer. There is even some information that  “genes from an arctic flounder (fish) which has antifreeze properties may have been spliced into a tomato to prevent frost damage.”  Such a thing would allow for the harvest of some tomatoes after the fall frosts had occurred, extending their season.  A few years back, there was a potato produced that had a spliced in biotoxin that would kill off the Colorado Beetle.  This potato is no longer in large-scale commercial production, but it is my understanding that it is still out there. What convenience!  Just imagine never having to pick a Colorado Beetle off a potato plant ever again!

But you would wind up with chemicalcorn, fishtomatoes, and bacteriapotatoes, something that I am not so very sure that people would want to EAT.

Genetic engineering for the sake of convenience of large scale growers or farmers may be handy and produce high yields but the use of GMO processes is not precise which can lead to unpredictable effects. And there have been no long-term studies on the safety of Genetically Modified foods.  And GMO plants can spread their strange hybrid ways about by cross breeding with members of their own species from garden to garden, a troubling aspect.

Arrangement of Vegetables

Although GMO seed and plants don’t seem to be common in the gardening section of the big box stores, the fact is that they could still be in there.  It is, therefore, imperative that you take measures to keep Genetically Modified seeds and plants out of your garden completely. .

When we buy plants from a big box store such as Lowes or Home Depot, we are buying plants that are shipped in from big commercial nurseries that are hundreds of miles away.  Local small farms and nurseries, however, often grow their own plants and can tell you exactly where their seeds came from and whether or not the plants were organically grown.  Generally, the local small operations have a reputation to uphold and want nothing to do with Genetically Modified seeds or plants.  Buying local can help you to avoid GMOs in the garden.

Another way is to grow plants from seed YOURSELF.  In a previous post of this blog I went into a great deal of detail in outlining the process of growing your garden from seed.  You can purchase all organic or all heirloom, open pollinated varieties of seed from reliable sources and start your garden from that.  You control the entire process yourself. This is an extremely economical way to avoid the possibility of winding up with GMOs in your garden.

Just some words to the wise as you are considering seeds and plants for your garden this year. . .

Another Garden Season is Upon Us. . .

Even though it is Farm Show Week, it is NOT TOO EARLY to start thinking about your garden and what you will plant when the gardens open (hopefully) in March.  They opened on March 17th last year, and considering that date, we could have only about 68-70 days until the gardens open once more.  In terms of weeks, that’s about 11 weeks—not a long time at all. That isn’t very long, and so you need to be thinking about what you will plant and when.


It is certain that the seed catalog companies are thinking about you and your garden.  I am simply inundated with catalogs.  Just to see if anyone is paying attention to this blog, I intend to leave a generous supply of seed catalogs on the Picnic Table over in the gardens on Saturday next, weather permitting.  The catalogs will be in a plastic bag.  Some will be 2012 catalogs, but there will be a few very nice 2013 ones there as well, including a Baker Creek Seeds Heirloom catalog.  Some fortunate person will have interesting reading over the winter. . .


EXIF_JPEG_T422


In a past issue of this blog I mentioned the need to PLAN YOUR GARDEN.  Planning is absolutely essential to having a good harvest.  Planning is especially necessary if you only have one or two plots to work with.  A garden plan will save time, space and money. You will get much more out of your garden and you will be able to increase the length of the harvest season, at least well into the fall of 2013. You will make proper and complete use of your space, which alleviates crowding of vegetables or encroachment on areas where you should not encroach.

There are two ways to make up a garden plan. First, you can do it manually. Start by  making a scale drawing of your available garden area on graph paper. You can get graph paper at any office supply store—you will find it in among the school supplies. Divide the drawing into cool-season and warm-season vegetable planting areas.

Cool-season vegetables                           Warm-Season vegetables

Onions                                                                        Corn

Cabbage                                                                     Tomatoes

Sweet Peas                                                                Green Beans and Dry Beans

Radishes                                                                    Peppers

Collards                                                                     Okra

Kale                                                                             Potatoes  and Sweet Potatoes

Mustard Greens                                                     Summer Squash

Lettuces                                                                    Winter Squash

Spinach                                                                      Cucumbers

Broccoli                                                                     Eggplant


Cool-season vegetables can generally be planted as soon as the garden can be worked. These plants LOVE the cool early spring weather, and generally do better early in the season.  They can withstand some frost. They also flourish then because there are LESS BUGS to disturb them.  But the veggies on the Warm-season list cannot be planted until AFTER the last frost date for our area, which is ON OR ABOUT MAY 5.  White potatoes are an exception, as they can generally be planted by mid-April.  In the case of corn, it should not be planted until the soil has warmed up to about 55-60 degrees.  Also, both the NIGHTS and the days must be warm (temperatures at or above 55 degrees) if corn is to be successful.


Anyway, you plant your Cool-Season veggies early and harvest them before the summer heat begins, so that that area of your garden can then be used for the Warm-Season veggies.  This allows you to use your space to best advantage.


The Other Way that you can easily plan your garden is to use the Grow Veg Garden Planner mentioned in the blog post:  found here:

Planning

There is a free trial period, but after 30 days you must buy a subscription.  It is well worth it because of all of the beneficial helps this planner provides.  This is the planner I use.

samplegardenplan

Some of the Cool-Season veggies can be sown directly from seed as soon as you have worked your garden after it opens, but generally broccoli, cabbage and onions will do better if planted as PLANTS.  This can be done two ways.  You can wait until the Home Centers stock veggie plants and buy them (poor selection) or you can start them from seed (great selection).  Did you know that last year the ONLY veggie that was planted as a purchased plant in my garden was Eggplant.  All of the other plants that I set out were from seed that I started at home, or from seed that was directly sown. Starting your own plants from seed saves an enormous amount of money and it allows you to plant favorite, heirloom or unusual varieties that are not found in the Home Centers.

Cool-season vegetables

Onions                         Set out plants in March

Cabbage                      Start seed indoors by March 1; set out April 1

Sweet Peas                Direct Sow in March

Radishes                     Direct Sow in March

Collards                      Direct Sow April 1

Kale                              Direct Sow April 1

Mustard Greens      Direct Sow April 1

Lettuces                     Direct Sow in March

Spinach                      Direct Sow April 1

Broccoli                     Start seed indoors by March 1; set out by April 15


Warm-Season vegetables

Corn                             Direct sow between May 6 and June 15; Avoid corn plants!

Tomatoes                   Start seed indoors by March 1; plant out May 15

Green Beans              Direct Sow May 1

Dry Beans                  Direct Sow May 1

Peppers                       Start Indoors Feb 28; plant out May 15

Okra                              Direct Sow May 15

Potatoes                      Plant by April 15

Sweet Potatoes         Plant slips after May 15

Summer Squash       Direct sow between May 15 and May 31

Winter Squash          Direct sow between May 15 and May 31

Cucumbers                 Direct sow May 1

Eggplant                      Set out plants May 15


As far as the proper technique for starting seeds indoors is concerned, I had given complete instructions in a previous blog.  Three of the most important instructions are: (1) CLEANLINESS!  Everything must be very clean; (2) Do not use any fertilizers on seedlings, and; (3) Do not use seed starters based on peat moss or peat pots of any type. If these reminders bring forth questions, then you will have to re-read the blog in question.


Not Too Early to Talk About Preserving the Harvest. . .

In my last post, which was (shamefully) back at the end of July, I promised to talk about Preserving the Harvest by dehydrating vegetables.

EXIF_JPEG_T422

This is my Vegi Kiln food dehydrator.  This device is used to dry vegetables and meats for storage.

EXIF_JPEG_T422

Although you can dry food by placing it out in the sun, or by using the oven (if the oven on your stove can be turned down to at least 140 degrees), the most efficient and least expensive way to dry food is by using a dehydrator designed for the purpose.  The reason why is because if you intend to dry food in the sun, you must build or buy special trays for that purpose and you must observe the food at all times to make sure that bugs or birds haven’t gotten into it.  Also, kitchen stoves are not generally equipped with fans to keep  the air circulating about the food and so it takes a much longer time to dry things in the oven and the energy cost is higher.  Initially, a food dehydrator will cost somewhere between $50 and $400 (the one I own is closer to the upper end in price), but it is well worth the cost to have an easy way to preserve your food that does not require the use of a freezer or canning supplies.

EXIF_JPEG_T422

This illustration shows eggplant, green peppers and summer squash that has been dried and sealed into jars.  The Half-Gallon jars in the background contain the equivalent of about 20 pounds each of eggplant and green peppers, and the quart jar in from contains the equivalent of about 10 pounds of dried summer squash.  To prepare these dried vegetables for cooking all you have to do is soak them in some water.  You can also simply add them to a soup and they will be fine.  I have also dried celery, collards, kale, okra, hot peppers and onions.  The really nice thing about storing food as dried goods is that it is lightweight and takes up far less space than traditionally canned or frozen foods.  For example, 20 pounds of tomatoes can be dried down to a pile that weighs only about 18 ounces. Drying is ideal for limited-space situations, such as apartment  or small home living.  The actual process of drying veggies and fruits is fairly simple.  Veggies are washed and cut into serving-sized pieces and blanched and drained, as if preparing them for the freezer.  The cut pieces are laid out in the dehydrator and the dehydrator is set for the specific temperature.  The drying veggies are then left for the appropriate amount of time until they are dry and brittle in texture. Fruits can be washed, cut and dried as serving sized pieces or they can be made into fruit leathers and dried that way.  There are easy to follow instructions and recipes here:

http://nchfp.uga.edu/publications/uga/uga_dry_fruit.pdf

Next time, I’ll talk a little bit about prepping the garden for another season, and give some neighborly reminders.  I’ll also talk about the reason why you should care where your garden plants and seeds come from.


In the Summer Kitchen. . .


Heat from the canners keeps the air conditioner running.  Bill was over 200 dollars this month, so I’m turning off the central air, loading up the room with fans, and opening the windows.   In the old days, people did all of their summertime cooking and canning in a little building separate from the house called a “Summer Kitchen.”  That way, the heat from the stove running would be kept out of the house.  How nice it would be to have a summer kitchen at my house!

(Summer Kitchen illustration courtesy of http://www.notjustblackboards.com)   

Canning Season Starting

Have you started to can and freeze the harvest from your garden?  I have.  So far, I have canned 17 quarts of white potatoes and 5 quarts of spaghetti sauce (which includes summer squash, peppers and onions from my garden) , and I have frozen 5 quarts of sweet corn, 3 quarts of cabbage, 3 quarts of broccoli, 3 quarts of green beans and 2 quarts of okra.  I have about 5 quarts of sauerkraut working right now. All this on top of the delight of eating fresh sweet corn, tomatoes, cabbage, broccoli and potatoes.   I have also donated cabbage, squash, onions and potatoes to the Plant a Row for the Hungry Program.

Several months ago I shared information about the proper way to can and preserve fruits and vegetables.  Here is yet another resource that you may use:

http://nchfp.uga.edu/   

National Center for Home Food Preservation


Here you will find the A to Z of how to put food by and enjoy your harvest for months to come, SAFELY.  Don’t let the plethora of myths circulating on the internet frighten you into not canning.  Here’s a great list of the most common myths and their debunks.

http://www.foodbuzz.com/blogs/1454650-frugal-kitchens-101-debunking-10-canning-myths

Overconfidence may also be a problem.  As I wrote in my canning piece a few months back, SAFETY FIRST!

A national survey conducted by the Center for Home Food Preservation in 2000 revealed a high percentage of the people who can their food at home are using practices that put them at high risk for foodborne illness and economic losses due to food spoilage.  I found a self reliance website where people were actually asking for canning recipes for meats and vegetables using Boiling Water Bath canners.  This is both foolhardy and dangerous.  It set my teeth on edge. The only things that may be safely canned in a Boiling Water Bath canner are vinegar-based pickles and sauerkrout, high acid tomatoes, and fruits (jams and jellies).  That’s it.  Vegetables cannot be canned using a Boiling Water Bath canner unless they are pickled in vinegar.  Meat cannot be canned at all in a Boiling Water Bath canner.  It just goes to show that many are using hand-me-down recipes that are very old, based upon old wives’ tales or family traditions.  This can be dangerous! Just imagine the horror of poisoning your family at the Thanksgiving Table!

Remember,  NEVER rely on any canning recipe that was published prior to 1988—this includes hand-me-down family recipes that have not be tested for safety.  To be perfectly safe, only Boiling Water Bath can fruits, pickles and foods that have been tested to be high in acid.  Remember that the new sweeter tomato varieties MUST be pressure canned unless you add a tablespoon of lemon juice to each quart jar.  If you don’t want to do that, use a pressure canner.   And take care to maintain your canning equipment, especially your pressure canner.  If your pressure canner has a DIAL GAUGE , it should be checked every year for proper operation.  If your pressure canner has a WEIGHTED GAUGE, it doesn’t have to be checked by an expert every year, but you should replace the rubber gasket seal and overpressure plug at least once every two years.  Immediately replace any worn or cracked canner parts. And if the canner has been accidentally DROPPED, it should be replaced.

Late Blight

“Late Blight,” a fungal disease of plants, is a serious menace that has made history.  You see, Late Blight caused the Irish Potato Famine, also known as the Great Famine, 1845 to 1852.  More than a million people died of starvation because the population was highly dependent on potatoes for sustenance and this blight killed off all the potatoes.  Late Blight is a very quick killer, often destroying plants within a couple of days.

This summer, scientists have confirmed the existence of Late Blight in Central Pennsylvania.  Maybe we won’t die if we get no potatoes, and for most of us the potato season is over anyway, but there is still the problem of Late Blight, which can still affect tomatoes and eggplant.   Unfortunately, if you notice any signs of Late Blight in your garden, you MUST DESTROY THE BLIGHTED PLANT by uprooting it and removing it completely, or else  blight will spread automatically to the healthy plants.

http://extension.psu.edu/vegetable-fruit/blog/2012/late-blight-is-now-confirmed-in-9-counties-in-pennsylvania

Some really good pictures of what it looks like on a tomato plant:

http://www.ct.gov/caes/lib/caes/documents/publications/fact_sheets/plant_pathology_and_ecology/late_blight_image_gallery_2009.pdf

http://usablight.org/

http://usablight.org/sites/default/files/upload/Trifold_late_blight.pdf

Fortunately, modern science gives the solution of spraying anti-fungals which prevents the Late Blight.

If you don’t have blight and you don’t ever want it in your garden, start spraying with fungicides.  I use the Bonide Product pictured above.  You may also use Daconil.  Tomatoes, eggplants and squash are sprayed at least once every two weeks. Both of these fungicides are available at Stouffer’s of Kissel Hill on Linglestown Road.  But any fungicide that is marked for use in vegetable gardens will do.  It is essential that you keep Late Blight out of your garden because it will keep coming back year after year and it will kill plants other than just potatoes and tomatoes.

Speaking of potatoes. . .

Digging Potatoes—New or Storage?

Some gardeners have asked me why we haven’t dug all of our potatoes up yet.  Simple answer is that we want potatoes that are ready for storage, and so we let them sit in the garden awhile.  For winter storage you need to wait until the tops of the vines have absolutely and totally died before you begin harvesting. This causes potatoes to develop the tougher skin that they need for storage.

Since Potatoes can tolerate light frost, you could leave them in the ground until the end of the garden season, but there is the problem of predation by insects and animals, so it is probably best to dig potatoes when the vines have died out and the ground is moist, but not wet.

Of course, if you are digging potatoes for dinner or immediate use, then do so at any time when the vines are dying.  These are known as “new” potatoes, and they are much more tender.  The skins of mature potatoes are thick and firmly attached to the tuber. If the skins are thin and rub off easily, your potatoes are still “new” and should be left in the ground for a few more days.

For more information on storing potatoes after they are harvested, see the article here:

http://www.gardeningknowhow.com/vegetable/storing-garden-potatoes.htm

And, of course, potatoes can be canned. . .

What’s buggin YOU?!?

Bugs have been a dreadful problem so far this season.  Corn has been infested with Sap Beetles and Earworms.  Tomatoes and eggplants have been plagued by armyworms, Colorado Beetles and hornworms. Sometimes I feel like we are at war. However, I think the worst problem has been this little guy. . .


This is a Cucumber Beetle.  The name stems from the tendency for adults of these beetles to be found on the leaves and flowers of melons,  cucumbers and squash. But these little nightmares will also eat corn, beans, onions, eggplant and tomatoes.  If you’ve seen tiny round holes in the stems of any of your plants, or you’ve harvested an onion with part of its bottom missing roots and mushy, then this is probably the culprit.

The two most common pests in this family are the striped cucumber beetle and spotted cucumber beetle, which looks very much like a green ladybug. However, unlike the ladybug, cucumber beetles are not considered beneficial insects. They are sucking invaders which harm crops.   Cucumber beetles are hard to kill and are a menace at all of their life stages.

Adults will attack the tender young growth of stems and leaves, and the buds and petals on your plants.  They also carry and spread the bacterial wilt, and mosaic virus.  When their eggs hatch they produce a little worm that tunnels into plants at ground level, destroying the roots.  The plant quickly wilts and dies.

Cucumber beetles can live through the winter in compost and weed piles so it is essential that you till all compost piles under at the end of the season and remove weeds completely from your garden.  Keeping your garden free of  weeds and debris is essential.   A weedy garden is nothing but a breeding ground for these pests.

Also, it does help to completely remove any plant that has been killed by Cucumber Beetles.  For those among us who are organic gardeners, dusting with Diatomaceous Earth, or spraying with Spinosad-based insecticides or Neem Oil Soap will control them.   Pyrethrin-based sprays also work well as controls.  What I generally use is “Concern,” a Diatomaceous Earth product, and “Captain Jack’s Deadbug Brew,” which is Spinosad.  I have heard that Neem Oil produces an immediate knock down and kill of the Cucumber Beetle which is as effective as spraying with Pyrethrins.

And speaking of weeds. . .

Some gardeners have actually asked me and my husband how we manage to keep our garden so free of weeds.  There has been some speculation that we use herbicides.  NOPE.   A few months ago, I spoke in detail about controlling weeds in the garden.  One of the things I mentioned was the importance of having a good HOE.   A HOE is the most important garden tool you can have, even more important than the tiller.  Our garden was tilled only twice this year at the beginning of the season.  beds and rows were formed for the vegetables, and we never step in them so the soil is never compacted.  The ground is kept clear by regular application of very sharp HOES!  That’s all.  Regular hoeing with a hoe that is comfortable to use and SHARP does the trick.  We have four hoes.  A small-headed one for getting in between plants, a regular one and an articulating one for clearing out the paths, and a corn hoe that is used to hill up corn, potatoes, and greens.  Remember–you can’t just start using a hoe that you just bought from the hardware store or home center WITHOUT SHARPENING IT.  Hoes are not sold sharpened for safety reasons.  It is up to you to sharpen your hoe after you buy it. If a hoe cannot be sharpened, it’s no good, and there is no backbreaking labor like trying to keep your garden weeded with a dull hoe!

Here’s a good step-by-step lesson on how to sharpen your hoe:

http://www.ehow.com/how_8651867_use-files-sharpen-hoe.html

Another appears on You Tube:  here a hoe is stone-sharpened–

http://www.youtube.com/watch?v=4nERyQeFtc8

Our hoes just cut through weeds like butter.  Weeding is effortless.  I can usually weed my large garden patch in about 45 minutes to an hour (three plots) and our single plot in about 15 minutes.   No herbicides needed.  A good sharp hoe is a gardener’s best friend.

Well, I promised to talk about drying veggies for storage, but due to time considerations, that will have to wait for the next post.  Also, in the next post I will be discussing how you can prepare your garden for the next season.  We are getting what’s left of our potatoes out and we will be prepping that plot for the end of the season shortly.  I should have some pictures as well.

As usual, comments are appreciated!

Stir-Fried Lettuce and other interesting stuff. . .

“Stir Fried Lettuce!” What the Heck!

More about that later.   . .

Whew!   What  a Job it was this week getting the garden completely planted before the rain came, but the job is done.  Tomatoes, peppers, potatoes, corn cucumbers, onions, beans, celery,  eggplant  (AND LETTUCE) all in!

I noticed that many people have nearly completed their planting and the gardens look beautiful with all of the growing veggies.  This rain will help a lot, and when the sun comes out, everything will POP.

Everything.  Including the weeds.

Let’s face it.  In about a month from now, the weeds are going to get so bad that some people will simply up and quit.  The problem for those of us that remain is that the weeds in the abandoned summertime gardens will mature and quickly go to seed, spreading their little “children” into our gardens.  It doesn’t seem fair at all that some people will rent garden space and simply let that space grow over in weeds.

Sometimes, I think that there should be TWO garden checks; one in early May to make sure that gardens are actually being used and one in Mid-June to make sure that gardens are being TENDED.  If a garden spot is not being used or tended, it should be re-rented at half price to someone on the waiting list. . .oh well.  >Getting off soapbox now. . .<

Just a reminder that the easiest way to deal with the weeds is to attack them when they are small.  After they get big, they are very difficult to remove unless you rototill them under, and some of them shouldn’t be rototilled at all (Thistles, for example.  If you cut them to pieces, you need to remove all of the pieces or else those bits will take root and form new Thistle plants).  And you never want to wait until the weeds start to bloom.  They will just go to seed then and make an even bigger mess of your garden.  In a previous post I mentioned how removing the weeds when they are young reduces the number of weed seeds in the soil and this will cause you to have LESS WEEDS both this season and next.  When they are small and the ground is softened by rain, they are easy to tear out with the hoe.  Another quick way to deal with them is to simply whack them down with a weed whacker or lawn mower.  That, at least, will keep them from flowering and spreading, and the garden will have a well-tended appearance.

Yes, the gardens will soon be producing nice salad greens and greens for stir-fries.  This means that we all need to think about canning and preserving what we have NOW.  This installment of the Dusty Hoe will include some unusual recipes as well as freezing  tips.  We also need to be mindful that nothing goes to waste.     Not even the extra Lettuce.

One very good way to prevent waste is to participate this year with Channels Food Rescue’s PLANT A ROW FOR THE HUNGRY.   I had previously written about how hungry people sometimes actually come to the garden seeking food, and it is still a good thing to help out honest-hearted people who are looking for help.  Participating with Channels Food Rescue by giving your garden’s overflow will help out with some of this need.  I have deliberately planted some extra to give away.  Remember, there but for the Grace of God go each and every one of us.  Please share your blessings!

In some previous posts, I went over the proper procedures for canning and freezing.  I recently found this website which  provides some additional guidance about freezing vegetables in particular.

http://nchfp.uga.edu/how/freeze.html

This website is really good since it tells you exactly what DOES NOT FREEZE well and why. This is information from the National Center for Home Food Preservation–highly reliable.

By the end of Spring, many gardens will actually have lettuce going to seed.  Ugh!  Old lettuce is pretty nasty, too.  It is bitter and worthless.  Why not pick that lettuce while it is young and enjoy it.

Okay.  So you’ve eaten enough salad.  But did you know that lettuce can be preserved by canning (as a soup) or it can be sauteed, stir-fired and eaten as a side dish?  And stir-frying lettuce is a lovely way to use a lot of it quickly because it cooks down to small portions.  For example, a head of iceberg or 3-4 heads of Romaine will generally feed between 3-4 people.  What a wonderful vegetarian dish or a really nice alternative to serving cole slaw with barbeque!

Stir Fried Romaine Courtesy “Elinluv’s Tidbits”

Stir-Fried Lettuce (from About.Com)

Sick of lettuce in salads?  Try this as a side dish! I have, and it is delicious!

As a rule, the Chinese do not eat raw vegetables, and lettuce is no exception. This is a great side dish for Chinese New Year, as lettuce is considered to be a “lucky” food. Serves 4 – 6.

Ingredients:

1 head iceburg lettuce (or an equivalent amount of Romaine or Leaf Lettuce)

2 teaspoons soy sauce

1 1/2 teaspoons Chinese rice wine or dry sherry

3/4 teaspoon granulated sugar

1 1/2 tablespoons vegetable or peanut oil

2 garlic cloves, peeled and minced

1 1/2 teaspoons minced ginger

1/8 – 1/4 teaspoon red pepper flakes

1/2 teaspoon salt

1/2 teaspoon Asian sesame oil

1 cup cubed fermented Tofu (optional)

Preparation:

1. Wash the lettuce, drain and separate the leaves. It’s important to make sure the lettuce is dry). Cut across the leaves into pieces about 1 inch wide.

2. Combine the rice wine or dry sherry, soy sauce, and sugar in a small bowl, stirring. Set aside.

3. Heat a wok on medium-high heat and add oil. When the oil is hot, add the garlic, ginger and red pepper flakes. Stir-fry until aromatic (5 – 10 seconds) and add the lettuce and tofu (if you wish). Stir-fry the lettuce, sprinkling with the salt, for 1 – 2 minutes, until the leaves begin to wilt.

4. Give the sauce a quick re-stir and swirl it into the wok. Stir-fry for 1 – 2 more minutes, until the lettuce turns dark green. Remove from the heat and stir in the sesame oil. Serve immediately.

Here’s another version from  SeriousEats.Com—this one includes Cabbage

1 teaspoon soy sauce

1 teaspoon sesame oil

1 teaspoon rice wine or dry sherry

3⁄4 teaspoon sugar

1⁄2 teaspoon freshly ground black pepper

1/4 cup peanut oil or canola oil

4 scallions, cut on the diagonal into 1″ pieces

3 cloves garlic, minced

1⁄2 head iceberg lettuce, cored, outermost leaves discarded, inner leaves torn into 4-inch pieces

1 cup canned diced tomatoes, drained  (fresh tomatoes work well too!)

1 head cabbage, cored, outer leaves discarded, cut into 1-inch pieces

Kosher salt, to taste

1 small hot red pepper (optional)

Combine soy sauce, sesame oil, sherry, sugar, and black pepper in a bowl. Stir to mix. This is your sauce. Set aside, but keep it close to your pan.   Heat a large nonstick skillet over high heat, about 3 or 4 minutes, or until very hot. Add peanut  or canola oil. Immediately add garlic, tomatoes  and half the scallions. After 5 or 10 seconds, once the garlic starts to change color, add cabbage.  Cover and cook 15-20 minutes.  Cabbage will cook down.  Add lettuce. Saute 60 seconds, stirring every so often. Add sauce. Cook another 60 seconds, stirring so all the lettuce  and cabbage gets some of the sauce. Kill heat. Salt to taste. Remove to a bowl. Top with extra scallions and serve.

Lettuce Soup–

You can make a very simple form of lettuce soup by just simmering some chicken or vegetable stock and dropping some washed and roughly chopped-up lettuce into it.  The soup can be enhanced by adding other vegetables or even pieces of meat if you desire (beef, chicken or even shrimp).   A good dinner starter or lunch.  Lettuce can also take the place of Spinach or Kale in Italian Wedding Soup.

http://www.foodnetwork.com/recipes/emeril-lagasse/lettuce-soup-recipe2/index.html

This is the best lettuce soup recipe that I have found.  In order to finish the soup, it has to be processed in a food processor or blender before the cream is added.  Delicious!  You can also can this, but if you do can it, OMIT the olive oil for sauteeing the onions (just spray the pan LIGHTLY with PAM) and DO NOT ADD THE HEAVY CREAM or the CHIVES.  After cooking and processing the soup WITHOUT the Olive Oil, Cream and Chives, put it into sterilized hot pint jars  apply seals and process in a Pressure Canner (NOT A WATER BATH CANNER!) at 15 pounds pressure for 25 minutes.  When the soup is served later, simmer for 10 minutes, add heavy cream and garnish with chives.

In the next installment of this Blog, I will talk all about DRYING and preserving veggies.  Did you know, for example, that DRYING is a great way to preserve greens?  It also saves space, but to be successful, it must be done properly.  I will tell you all about that later.

People are Forgetting their Etiquette Again. . .

I wasn’t going to mention this at all, but it is really bugging me.   It seems that this year, I am once again cursed with bad neighbors!  First, there is the neighbor that irritated me by boasting that he had a garden spot three feet wider (due to inaccurate measuring by County Parks Staff). No starting out with “howdy,” just a gloat over the amount of extra space he has.  Guess where his additional three feet came from?  MY SPACE!  We were shorted three feet and barely had enough space to plant all of our potatoes.  In fact, all of the neighbors down from us were also shorted by mistake. I know THAT isn’t his fault, but the NERVE of some people.  He actually boasted and gloated over having the extra space, and made bad matters worse by complaining to other gardeners about MY REACTION to his gloat which was not a happy one.  Did he think I’d be happy to hear about the space I lost? Little did he know that the very people that he complained to know me and they told me about his rants.  I don’t know about anyone else, but no normal person wants to hear gloating about something like this.  I know that no one is perfect, but if you discover that your garden is not the right size and the blue marker stakes are the cause of the issue, BE MATURE– DO THE NEIGHBORLY THING and keep that information to yourself.  Bring it up at the annual picnic.  And don’t gloat out loud because your garden is larger than your neighbor’s .  This guy is clearly a fool. A friendly “howdy-do” as an opening statement would have been much better received!!

AND NOPE!  I’m not going to tell you WHERE it happened in the Community Gardens.  I am not an idiot like this guy. . .

But even worse is the neighbor who has expanded his or her share of  space in the Children’s Garden to include the entire walkway that leads to the Water Pump. They have arbitrarily expanded the size of their lots from 10 x 10 to something like 10 x 15 each, causing other people’s gardens to be “landlocked”.  They did this by removing the marker stakes, which is against the rules.  They may have encroached on other people’s space as well. I don’t believe that a child is doing this.  I think some adult scofflaw who thinks that garden rules don’t apply to them is involved. I telephoned Parks and Recreation to complain, and someone   supposedly took care of the problem bu resetting the stakes, but the scofflaw has once again taken over the path by pulling out the stakes that were reset,  leaving a space so narrow that people have to “tightrope walk” to get water.  In fact, the space is too narrow to use for people like me and my neighbor, because both of us have had recent knee surgery.   The path is impossible to use with a wagon or a garden cart.  People who ordinarily use wagons to get their water must drive to the pump in order to haul a sufficient amount of water away.  A lot of gardeners have expressed frustration and anger over the situation, but I don’t know whether or not anyone else has complained. It seems that people are just grumbling.  If everyone who is being inconvenienced complains, I think we will get action.  The telephone number is on the back of your Garden ID Card(s). In the meantime, I will telephone again and I will bring this matter up at the annual picnic if necessary.  Interestingly, this person did the same thing last year and there were complaints.  Hopefully,they will be permanently banned for bad behavior this time.

These are just two examples of  “Garden Hogs” who are making things unpleasant for everyone.  Please Don’t Forget Your Etiquette!   And happy growing to everyone, no.  matter.   what. . .

A reminder about Garden Planning. . .

Hello All!

Now that the assignment of garden plots is over, and everyone has their garden cards, it really feels like Spring is in the air.  I drove by the Gardens the other day and I saw that they have been both plowed and disced, and they look really good! Soon the Community Gardens will be a beehive as friends and neighbors meet while getting their garden plots ready for another great season.

In my last post, I did promise to give some more canning recipes that do not involve the pickling of vegetables, and I will post those.  But first, I want to go over the issue of garden planning.

Last February, I posted information regarding the importance of planning the layout of your garden. Since the garden assignments have been made for the season, the need to plan your garden is more important than ever.   Do you want to start out the season on bad terms with your neighbor?  It is easy to make an enemy.  By failing to plan out your garden space, could run out of space for planting. At worst, you might end up being the one who blocks someone from access to their space by putting part of your garden in public walkways or driveways OR putting your plants and seeds in another person’s garden.  Unbelievable, yet true!  This is why planning is all important.

Planning, planning and more planning!  Very important to Planting!!

Have you ever gotten your plants and seeds together and started enthusiastically planting them only to find that you’ve run out of space?  Believe me, it has happened to all of us.  However, the answer is NOT to:

–  Plant your leftover seeds and plants in the walkway, blocking your neighbor’s access to their garden;

—  Take  over the driveway/walkway space adjacent to Elmerton Avenue by simply (ahem!) moving the blue topped stakes to accommodate the “growing” size of your garden, or

–  Planting your leftover seeds and plants in the neighboring gardener’s space. Yes, this actually happens, believe it or not.

People, PLEASE!!!

It is AGAINST THE RULES OF THE DAUPHIN COUNTY COMMUNITY GARDENS TO:

–MOVE THE BLUE-TOPPED STAKES TO PLANT ANYTHING AT ALL IN THE WALKWAYS OR PATHS THAT YOUR NEIGHBORS MUST USE TO GET TO THEIR GARDENS,

–USE THE ‘LARGER’ WALKWAY NEIGHBORING ELMERTON AVENUE AS PART OF YOUR GARDEN SPACE ; OR

–PLANT ANYTHING WHATSOEVER IN YOUR NEIGHBOR’S SPACE .

to quote directly from the garden rules:

“If you mistakenly or intentionally plant in another gardener’s plot you will lose those seeds and plants. . .”

The same thing can be said of planting in the Elmerton Avenue park service driveway/walkway (that section of the garden immediately next to Elmerton Avenue) or of planting in the pathways and walkways.  No one is allowed to park on Elmerton, and so if you “landlock” your neighbors by blocking the pathways and walkways, your neighbors have the right to tear your plantings out because parking a car on Elmerton to access a garden plot is NOT ALLOWED.  When I was landlocked one year, this is what I did.  I took a hoe and destroyed the offending plantings.  Of course, the offending neighbor yelled at me, but I pointed to the garden rules and told him that I was not going to endanger myself by parking on Elmerton just so he could have the walkway as part of his garden.

Just last year, we had a problem with certain users of the Children’s Gardens who blocked other gardeners’ access to their plots and access to the pump by using the garden path as part of their plots.  I am not ashamed to say that I took my hoe and cleared the path for my neighbors.

If you notice that anyone has moved the blue path-marker stakes, or has “Landlocked” your garden by placing plants inappropriately , please call the Parks and Recreation Department at 599-5188 ext. 2117 to complain.  Then use your hoe to remove the offending plants.

The blue-topped stakes are there for a reason; namely to provide access to ALL gardeners.  Those set the size of each space at 30′ x 30′ (or 10’ x 10’ for a Children’s Plot) to make it fair for everyone.  You don’t have a right to use the space in the walkways or driveways as part of your garden. You don’t have a right to do that even if you have two spaces on either side of a pathway. The paths are for walking or so that people can get water and equipment up to their gardens without parking where they don’t belong.  No one has the right to force people to park on Elmerton Avenue so that they can reach their garden!!

A friend reminded me the other day of yet another problem that is associated with poor planning—using the walkways and pathways as equipment or water barrel storage areas.  Yes, some people feel that they need every inch of garden space for their planting (because they fail to plan out their garden) and so the hoes, rakes, trellises, garden stakes and water storage barrels, etc. are placed IN THE WALKWAY.  My friend complained to me that one of his neighbors had stored a bamboo fence or trellis along with a huge pile of stakes in the walkway leading to his garden, landlocking him.  I told him that he could move the pile of garden equipment gently over into its owner’s garden.  That stuff has no business in a walkway.

But what is the initial cause of this sort of problem?  POOR PLANNING!

In order to have a successful garden, you need to plan!  You need to know WHAT you are going to plant; but, more importantly, you need to know WHERE you are going to plant it.  Since the basic garden plot is 30 feet by 30 feet square, it pays, then, to consider what type of plants you will have, how many, and how much space each plant will need.

There is an easy way to plan out your garden space.  Go to

http://www.growveg.com/Default.aspx

and try out the free trial garden planner.  After you try it out, I think you’ll be hooked! This excellent helper device knows exactly how much space each type of vegetable plant needs and will tell you how many will fit in a given amount of space.  It also helps you to have a much more productive garden because you can actually plan the size of your garden paths to avoid wasting space.

For example, here is a link where you can view one of my garden plans.  What’s cool about this is that you can see the types of veggies I am planting and view information about them as well.

http://www.growveg.com/garden-plan.aspx?p=219442


And now, some more canning recipes that don’t involve pickling the veggies. . .

REMEMBER, these recipes REQUIRE the use of a Pressure Canner.  I am in NO WAY suggesting that a Boiling Water Bath Canner can be used at all for processing these, and I take no responsibility whatsoever if anyone attempts to substitute the proper use of a Pressure Canner in preparing any of these recipes. The recipe information for canned beets includes some links to places where you can buy a pressure canner.    Processing times shown below are for Harrisburg, which is about 1000 feet above sea level.  If you are in an area with a different altitude, you need to refer to the manual that comes with the pressure canner for the correct processing time.

Canned Beets (Not Pickled)

Many people enjoy buttered beets as a side dish.  Here’s a very good recipe. . .

http://pickyourown.org/pdfs/beets_canning.pdf

One good thing about this recipe is that you can turn these beets into pickled beets by simply draining the water out of them and adding a Bread and Butter Sweet Pickle brine.  Or you can turn them into Harvard Beets (another side dish) quite easily.

Whole Kernel Corn (Cold Pack)

3 to 6 Pounds of Corn on the Cob per quart

Salt (Optional)

Boiling Water

Husk the corn; remove the silks and wash thoroughly.  Using a sharp knife, cut the kernels from the cob, but do not scrape the cob.  Pack the corn loosely into clean hot jars, leaving 1 inch of head space.  Add ½ teaspoon salt to each pint or 1 teaspoon salt to each quart if you wish.  Cover the corn with boiling hot water, filling to 1 inch head space.  Use a spatula to remove the air bubbles and apply the caps, but do not over tighten.  Process pints 55 minutes and quarts 1 hour and 25 minutes at 10 pounds pressure in a Pressure Canner (refer to canner manual).

Peas (Cold Pack)

Who can resist delicious, buttered sweet green peas?  How about some nice Crowder Peas or Cowpeas for soups and stews?  Hopping John  (BlackEyed Peas) on New Years Day?  Here’s how to enjoy nice Peas when the snow flies next winter! This recipe is suitable for any type of shelled peas.

3 to 6 pounds of unshelled peas per quart

salt

Boiling Water

Wash, drain and shell freshly harvested peas.  Wash again and drain. Pack the peas loosely into clean hot jars, leaving 1 inch of head space.  Add ½ teaspoon salt to each pint and 1 teaspoon salt to each quart if you wish.  Cover peas with boiling water, up to the 1 inch headspace.  Use a spatula to remove air bubbles, apply caps, but do not over tighten.  Process pints and quarts 40 minutes at 10 pounds pressure.  (Refer to Pressure Canner Manual for processing information).

Green Beans (Hot Pack)

Here’s a shortcut to that Thanksgiving Green Bean Casserole or Green Bean and Ham Dish!

1-1/2 to 2-1/2 pounds of green beans per quart

Salt

Boiling Water

Wash the green beans thoroughly, rinse and wash again. Drain. Trim ends, remove strings and cut or break into pieces.  Place beans in a large pot and cover with Boiling Water.  Boil 5 minutes, drain.  Pack the hot beans into clean hot jars, leaving 1 inch of head space.  Add ½ teaspoon salt to each pint or 1 teaspoon salt to each quart if you wish.  Cover beans with boiling water up to the 1 inch headspace.  Remove air bubbles with a spatula and apply caps, but do not overtighten.  Process pints 20 minuts and quarts 25 minutes at 10 pounds pressure (refer to manual for Pressure Canner for further information.)

Well, I can’t wait to get into the Garden!  I have Potatoes, Onions, Cabbage, Brussels Sprouts Collards and Kale that are ready to go!

You CAN start a garden from seed. . .

Last year, I had very good success in starting plants from seeds.  In fact, ALL of my tomatoes, cucumbers, squash, cabbage, hot peppers and sweet peppers were all started from seeds that I planted during the winter months. By the time the gardens opened (LATE, I might add!) the plants were large and healthy enough to set out.  My harvest was excellent!  Not to mention that I was able to grow unusual varieties such as “Flying Saucer” squash, “Cool Breeze” and “Homemade Pickles” cucumbers, “Black Sea Man”, “Paul Robeson” and “Amish Paste” tomatoes, “Caraflex” and “Baby Choi” cabbage, “Kung Pao” and “Ancho” hot peppers and “Goliath” , “Gypsy” and “Fooled You” sweet peppers.   It is TRUE:  growing from seed allows you much better choices than the plants found in local home centers and gardening stores.

This year, I am going to grow more Oriental Greens, herbs for Vietnamese PHO soup, and a bush celery called “Par-Cel”.  You will never find this in the stores locally, but growing from seeds makes it all possible!

Many gardeners don’t bother growing from seed.  They have suffered all of the pitfalls (and there are a few) and they simply want to have a sure thing.  I understand perfectly.  So they go to the local home centers or garden stores and buy whatever plants are there.  The problem with this is that you are stuck with someone else’ s choices.

For example, I plant only heirloom tomatoes.  Leggy, indeterminate vines, but the rich delicious flavor cannot be beat.  Also, the QUALITYof the fruit!  Last year, I was harvesting plum (paste) tomatoes that weighed at least a pound apiece.  And the sauces and ketchup I made was outstanding!  But you can only get this from starting from seed.  None of the local garden shops carried the species of tomato I planted.

Also, if you are a seed saver (I am), you can actually save seeds and plant them for the next season if you grow the heirlooms.  You cannot save the seeds from the hybrids that most home centers and garden shops sell. Plus attempting to save and grow hybrid seeds is ILLEGAL because the plants are patented.  Betcha didn’t know that!!The number one reason why gardeners give up on starting from seeds is that the seedlings fail.  And the top two reasons why seedlings fail is leggy-ness and Damping Off Disease.  In this episode of The Dusty Hoe, I am going to give some tips that will make growing your garden from seeds much more successful.

Leggyness

We have all seen this.  Your seedlings come up just fine, then they start to grow longer and longer stems, generally stretching in one direction or another.  This problem is called “leggyness,” and it is caused by only one thing:  lack of light.

Seedlings that are planted in areas of inadequate light will “stretch out” toward the direction of any available light so that photosynsthesis can occur.Photosynthesis is the way plants get their food and survive.  A simple solution is to make sure that the seedlings have plenty of light for at least 14 hours per day.  In a previous blog, I told you how to build a grow-light system.  If a plant does turn leggy, you can help it by replanting it.  Simply get a larger pot (clean and sterilized, of course) and replant.  Bury the plant up to within a few milimeters of the leaves.  Make sure the plant gets plenty of light after that.   The long stem will become a root and then the leggyness problem will be solved.   Doing this helped me to save a number of my tomato plants last year. . .
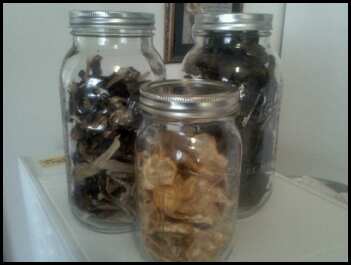
Damping Off Disease

Damping Off is the most disappointing thing about growing a garden from seed.  Every gardener has seen it:  your seeds germinate and the little plants come up. Then, within a few short days, those small seedlings start to wilt.  The stem gets a “pinched” appearance at its base, and then the plant stretches out, topples over and dies.  When you look closely, it almost seems as if the stem has been cut off at the soil level and the soil itself is covered with mold.  What’s worse is that Damping Off disease is contagious. It can quickly spread from plant to plant.  It’s a bad start to the new gardening season.

This problem is so common and so disappointing that many people simply refuse to buy seeds at all. Many gardeners who resort to the purchase of expensive plants will tell you that it is just too much trouble to start seeds at home.  For them, the plants are a sure thing and the seeds are a gamble.  And it is both frustrating and time consuming to watch seedlings so carefully planted die, causing you to have to start all over again.  But Damping Off is preventable.  By following some easy tips, you can be successful at starting a whole garden from seed.

Damping Off Disease is caused by a fungus that normally lives in soil.  It loves cool, dark, wet or damp places.  Lack of air circulation also encourages its growth.  Also excess nitrogen in the soil feeds the growth of this disease.  Like I said previously, Damping Off is contagious; that is to say that it is airborne and spreads easily from one plant to another.  Once you have a single cell in a tray full of plants affected, it will not be long until the entire tray is destroyed.

Many gardeners make the mistake of starting their seeds indoors, in the basement.  This is not good because cool basements are breeding grounds for this disease.  Also, some gardeners forget to WASH  their seedling trays and equipment before use.  This allows the disease to spread to from contaminated trays to the new seedlings that are planted.  Here’s some really good news….. Damping Off Disease can be easily prevented.

(1)       Make sure that your trays and pots are CLEAN.  Wash all of your pots (if plastic ), trays and seed handling equipment.  If you use clay pots, they may have to be discarded if contaminated with Damping Off.  Clay is porous and difficult to properly clean.  A simple wash with a LITTLE dish soap and a good rinse in hot water to which Hydrogen Peroxide has been added (see formula below) will do.  Afterward, dry thoroughly.  Equipment that you are not going to use immediately should be stored in a CLEAN plastic or paper bag so it stays clean.

(2)      Don’t start your seeds in the basement if your basement is not above ground.

(3)      Use only sterilized seed starting soil.  Don’t use old garden soil or potting soil that is not sterile. This is the secret of greenhouse growers and farmers everywhere.

(4)      Avoid the use of peat pots.  I wrote about their problems in a previous blog.

(5)       If Damping Off happens, act immediately to eliminate it. Remove diseased plants and their pots from your trays so it doesn’t spread.   Replant, if needed, in fresh sterilized soil and clean containers. Throw the old soil into the compost bin or else discard it. Do not reuse the soil. Wash and sterilize any pots that you save.

(6)      Make sure that your seedlings get as much light and air as possible.

(7)      NEVER use so-called “humidity domes” on your seedling trays. Let the air circulate.

(8)      Allow the soil to dry out between watering.  Watering from the bottom is best.

(9)      Use only Distilled water to water your seedlings.

(10)  Do not use any type of fertilizer on your seedlings.  NOPE, not even the blue stuff that you add to water.  Nitrogen in the fertilizer will cause Damping Off Disease.

Some people believe that there are certain home remedies for Damping Off.  Gardeners have reported success with the following:

–Soaking seeds in a small amount of water to which a crushed clove of garlic had been added;

–Misting or watering the seedlings with Chamomile tea;

–Dusting a little bit of fireplace ashes over the top of the soil after the seeds are planted;

–Dusting a little bit of Cinnamon over the top of the soil after the seeds are planted.

Hydrogen Peroxide Solution for sterilizing seed growing equipment:

A Hydrogen Peroxide solution may be made using the same Hydrogen Peroxide that you find in drugstores and supermarkets (3%) , by adding it to a gallon of distilled water as follows:

1 to 4 Tablespoons; for watering seedlings and potted plants. Prevents Damping Off.

3 to 6 Tablespoons; for watering outdoor plants.

5 to 8 Tablespoons; for dipping seeds or roots prior to planting or repotting.

10 Tablespoons for rinsing pots and trays.

Full strength for cleaning tools and wiping down work areas.

Next time, we’ll talk about garden planning again.  Planning is the only sure way to make sure your space is utilized to the maximum!

Preparing for the Upcoming Season. . .

For me, 2011 was an eventful year, and I don’t mean in a good way.    My father-in-law suffered a back-breaking fall in February 2011, and subsequently suffered both a heart attack and a stroke.  This resulted in his removal from his home of 50 years and his placement in a nursing home.  Needless to say, my husband (who is an only child) and I were extremely busy with handling Dad’s affairs, including the cleanout and sale of his home, which is located in Ontario Canada.  Then, my mother, who is in a nursing home with Alzheimer Disease, suffered a physical setback.  We thought that we were going to lose her, but she slowly recovered.  The Alzheimer’s is still there, though.  The final and most bitter blow occurred in June 2011, when my dear sister lost her fight with Breast Cancer.  But even more had to happen.  After all of that rain and flooding in September 2011, we found some mold on the wall in our family room, and we had to tear all of the drywall out.  My husband insists on doing all of the work himself and the job still isn’t complete.  Then, my old car died and we had to buy a new one.  Oh well.  Once the gardening season starts, I’ll be washing the garden dust offa that 2012 Camry daily.  2011 was an “Annus Horribilis.”  Needless to say, all of this turmoil took me away from this blog, but now I am back.

I was going to give some tips for garden cleanup, but I will save them for later.  Anyone who drove through the gardens at the end of the season saw that my plot was completely cleaned of weeds, rototilled and planted over in cereal rye.  There is a really good reason for that, but I’ll talk about it later. The holidays are over, winter is in full swing, and most of us are sitting in our nice cozy homes pouring over the seed catalogs again.  I am looking forward to a great gardening year, and I know that you are too.  Now is the time for planning the upcoming gardening season.

Back in October,  I received the results of the soil analysis from Penn State.  I am SURE you will be interested in hearing about that.  And that has everything to do with how you get your garden ready for planting this spring.

But first, here are some canning recipes that I promised.  As you will see, none of them are pickles or canned fruits.  In order for canning to be a good method of preserving and putting food by, one needs to know how to can all sorts of foods; and, in particular, foods that can be used in recipe preparation or foods that can be eaten plain. Also, I have left out canned meat recipes.  I will post some of those later. . .

Canning Recipes—


As I mentioned in my previous posting, not all vegetables from the garden need to be processed as pickles.  IF YOU ARE USING A PRESSURE CANNER, they can simply be processed as canned goods and consumed as regular vegetables.  I realize that the official canning season is over, but some of these recipes will help you to preserve the bounty that is now showing up in many farmers’ markets, especially if you don’t own a freezer. Besides.  you can still use these recipes when the canning season for 2012 starts in about six months.

Canned Pumpkin and Winter Squash

http://nchfp.uga.edu/how/can_04/pumpkin_winter_squash.html

Why did I show this link?  Because improperly canned pumpkin can be dangerous. I didn’t think you’d believe me, so there it is, the RIGHT way to can pumpkin, straight from the horse’s mouth. There is no other safe method.


Canned White Potatoes

If your garden produced a lot of potatoes, and you are now having trouble keeping them from rotting or spoiling, you can CAN them.  Here is a simple recipe from the Ball Book:

2-3 Pounds White Potatoes per Quart

Salt (optional)

Water

Wash and peel potatoes. Wash them again.  Leave small potatoes whole but cut the larger ones into chunks. Put the potato chunks in a large pot and cover with water. Boil 10 minutes. Drain.  Pack the hot potatoes into hot jars, adding water from the cooking pot to cover within 1 inch of the top of the jar.  Add ½ teaspoon salt to each jar if you wish. Remove air bubbles and cover with two-piece canning caps.  Process pints 35 minutes, quarts 40 minutes at 10 pounds pressure in a pressure canner.

These canned potatoes are GREAT for making hash browns or mashed potatoes!


Canned Sweet Potatoes

2 to 3 pounds Sweet Potatoes per Quart

Water

Wash sweet potatoes. Peel and cut into chunks.  Wash again. Boil chunks 10minutes.  Pack hot potatoes into hot jars.  Cover with boiling water to within 1 inch of the top of jar. Remove air bubbles and cover with two-piece canning caps. Process pints 1 hour and 5 minutes; process quarts 1 hour and 30 minutes, at 10 pounds pressure in a pressure canner.

These can be used for any recipe, from soups to sweet potato pie.


Okra

A lot of people asked for this recipe because many think that the only way to preserve okra is as pickles.  Not so. . .

2 pounds Okra per quart

Salt

Water

Wash and drain okra. Remove stem and blossom end. Either leave whole or cut into slices. Put okra into a large pot and cover with water.  Boil 2 minutes. Pack okra into hot jars, and add 1 teaspoon salt if you wish. Fill jars with boiling water to within 1 inch of the top of the jar. Remove air bubbles; cover with two-piece canning caps.  Process pints, 25 minutes; quarts 40 minutes at 10 pounds pressure in a pressure canner.

Great for use in soups, stews or gumbos. . .

Okra also freezes beautifully.  Simply wash,  remove the stem and blossom end,  and blanch in boiling water for about five minutes.  Remove the okra from the boiling water and plunge immediately into cold water to stop the cooking process.  Drain thoroughly and place in labeled  plastic freezer bags. Frozen okra will keep nicely for about 6 months.


End of the Garden Mixed Vegetables

6 cups of sliced carrots

4 cups peas

4 cups cut green beans

3 cups of peeled and cubed potatoes

2 cups of quartered onions

2 cups sliced celery

2 cups chopped sweet bell pepper

¼ cup chopped parsley

2 tablespoons salt

1 tablespoon pepper

3 quarts of chicken stock or chicken broth

Combine all ingredients in a large stockpot. Bring to a boil, then reduce heat and simmer 5 minutes. Ladle into hot jars, filling to within 1 inch of top of jars. Remove air bubbles and apply two-piece caps.  Process quarts 40 minutes at 10 pounds pressure in a pressure canner.

This makes a wonderful quick soup starter or it can simply be buttered and served with dinner as mixed vegetables.


Green Peppers

Just before cleaning up the garden for the last time, I harvested an abundance of green peppers.  This is what you do with them if your freezer is full and you don’t want them pickled. . .

1 pound green peppers per pint

Salt

Vinegar

Water

Wash green peppers, removing stem and seeds.  Cut in quarters. Blanch 3 minutes, drain. Pack peppers into hot jars, leaving 1 inch headspace. Add ¼ teaspoon salt and ½ tablespoon vinegar to each jar.  Cover with boiling water to within 1 inch of the top of jar.  Remove air bubbles and apply two-piece canning caps.  Process half-pints or pints 35 minutes at 10 pounds pressure in a pressure canner.

Peppers also freeze nicely.  Simply wash green peppers, removing stem and seeds.  Cut in quarters. Blanch 3 minutes, plunge into cold water to stop the cooking process and drain.  Pack peppers intolabeled plastic bags and freeze.  Lasts about 6 months in the freezer.

These peppers can be added to any recipe that calls for green or bell peppers and they will not add any pickly or sour taste s they are processed plain.

Over the next several weeks, I will post even some more canning, preserving and freezing recipes so that you will have them early in the canning season this year.  I also certainly hope that readers will share any recipes that they have.


In the fall of 2010, as everyone knows, an abundance of leaves were dumped in the gardens.  Unfortunately, these leaves were deposited in several massive heaps at the “State Farm Drive” end, with nothing at all being placed at the other end.  The dumping of the leaves caused numerous complaints because they were never properly raked over all of the garden plots and tilled in. Instead, they were improperly left in ungainly heaps everywhere and they became somewhat of a problem.   Unfortunately, many people complained about the dumping of the leaves as if the leaves themselves were garbage, and so the County did not have any leaves placed in the Gardens this year.  This is very unfortunate for those of us who did not get any leaves placed in our gardens at all.  What this really means is that only half of the garden plots received the necessary supplement of organic materials to enrich the soil.  The people fortunate enough to have all of that nice humus-rich soil at the one end now have far better growing conditions than people like me who are located at the opposite end.   At the other end, we have to deal with the dust, erosion and other problems that poor soil brings. My husband and I decided to invest $30 in having a soil test conducted at Penn State.  Our worst fears were realized.

I wanted to post the actual copy of the test results here, but the computer that I scanned the result report to is currently disabled as it awaits the completion of repairs to my family room.  However, I can TELL you what it said.

Where the leaves WERE NOT PLACED, the soil of the Community Gardens is terribly depleted.  It is so depleted in every single necessary mineral and nutrient that it is actually dangerous to all types of plants except weeds.  Also, the tightly packed nature of the clay-soil over there is such that it resists penetration by moisture.  Gardeners who got the leaves will have far better moisture retention.  In other words, at the leafless end water tends to run off, not sink in, no matter how much you water.  This explains poor results with many types of vegetable plants; thin harvests, pests, and diseases.  Penn State recommended that at least 40 pounds of garden lime be spread on each 30×30 plot and tilled in.  They also recommended that 40 pounds of organic 10-10-10 fertilizer be added to each plot along with all of the compost, composted cow manure or composted leaf litter you can add.

Last fall, when we prepared our garden for closing, we followed those  recommendations.  We also oversowed the garden with Cereal Rye (which fights weeds) and I added about 10 million beneficial nematodes to kill and destroy the Colorado Potato Beetle, Hornworms, and Squash Beetles that are wintering underground.  I also hope the nematodes kill off as many Stink Bugs as possible.   As soon as the gardens open up in spring, we will add even more organic material (composted leaves), and I will treat again with nematodes to get the bugs under control.   The Penn State recommendations pretty much follow the advice given in the article ” How to Build Topsoil, ” found here:

http://www.gardenguides.com/114562-build-topsoil.html?utm_source=popup&utm_medium=1

As I mentioned in a previous article, the answer is NOT to add the famous “Blue Stuff” to your water and feed that to the plants.  If the soil is bad, it will not be improved by this method.  Furthermore, you will be FEEDING THE WEEDS that thrive in poor soils, and causing a bad soil condition called “salting.”  Using organics to improve the soil will result in a permanent improvement that you will appreciate as you see better results and harvests, and fewer bugs and weeds.

Next time, I will discuss garden planning and how you can get the most out of your plot.  Also, I will talk a bit about how to grow plants from seed.